Baking Decorating and all things cookies is my passion. But when your cookie cutters start to grow you notice it takes a little bit longer to find the cutter you are looking for.
At first, I was comfortable placing the cutters inside an open box, this was very visible, and easy to find the cutters. But being honest it wasn’t cute at all and I knew it was time to make it work for me.

You might wonder why I want to change my current storage solution?
-
Well, I notice the more I look for a cookie-cutter the more I wonder what the shape was, so I knew it was time to update and find a new storage solution.
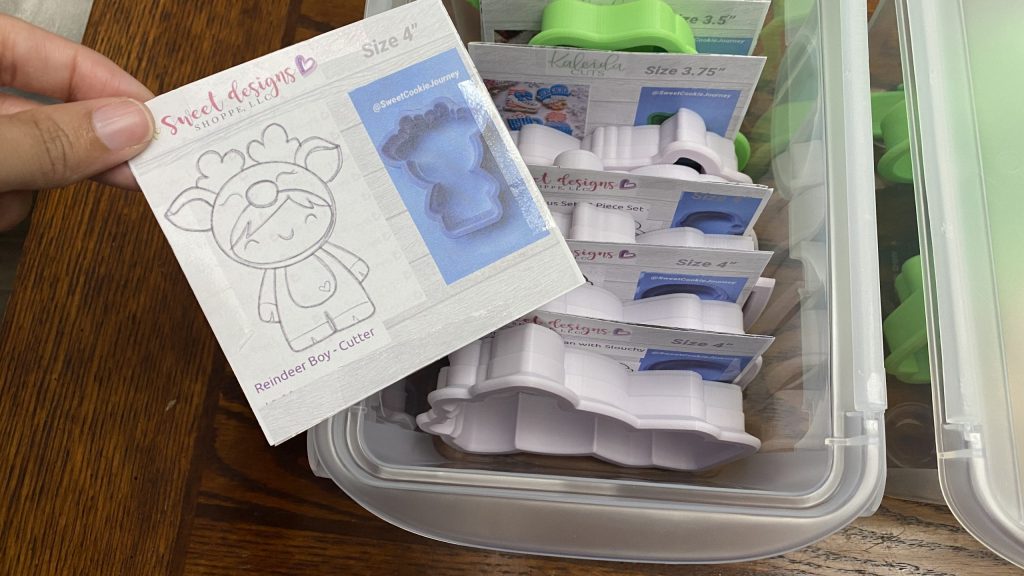
So the idea came to take pictures of my actual cutter and getting the picture from the website I purchased it.

Here is a sample sheet I created using the PicCollage app.
In this picture, I included
-
the website logo which will help for future reference,
-
the size of my cookie cutter, and
-
the descriptive name of that cutter too.
Now how can I find the right storage or container that is very affordable, that will fit inside my cabinet, and will fit more than 4 cookie cutters inside each container?
As I started to search I notice they were pricey and the capacity for a standard size cutter in one container was up to 2 cutters.
To be honest, most organizers can range well over $5+ for each small container and if you add one container for only 2 cutters the price will add up very quickly.
How to prepare each individual cookie cutter sheet

Since I couldn’t find the right storage for my cutters while I was away on a road trip I decided to create more of the sheets for each cutter.
Just know this is just a simple way to make a cutter sheet but you can change the background which is provided with the app or any other app you may have.
You can also change the look or add more info if needed.
So here is what I did.
-
Took out one box at a time (I had my cutters on separate small boxes) It was easier to start with one box.
-
I look for a binder that had a white background and places each cutter right on top to take a picture.
-
Find the best lighting or edit your pictures to make them a lot brighter, I also crop the picture just to show the cutter only
-
Once you finished with the first box, now you can visit the website you purchased those cutters and take a screenshot of each cutter
-
On that website, I take a picture of their logo, the cutter description, and cutters size. (an easier way to do this is by signing in and checking each order, it will show the cutters name and size)
-
Open Pic Collage app, select size 1.1, choose a background of your choice (it can be a solid color or the one I used resemble white wood)
-
At the bottom of the app, you can select photos, pick 3 pictures for each cutter (you can see a sample below- actual cutter, website cutter image, and cutter name)
-
Include the website logo by adding another photo, you can add a text and include your name and/or size of the cutter) you can add a text by clicking the text icon and select the font and color. THen you can type for example size 3.5′ and click the checkmark. The text can be moved by clicking on it and moving it, you can also make it smaller or larger by clicking and drag on the arrow on the right side.
-
Once you are happy with the sheet you can click on the top right-hand side DONE. then click save to library. Make sure you open your photos to make sure your cutter sheet was saved.
-
Once the image is saved you can click back and continue with the next cookie cutter ( I like to work with the same brand at first just so I don’t have to keep changing the logo) .
How to organize cookie cutters
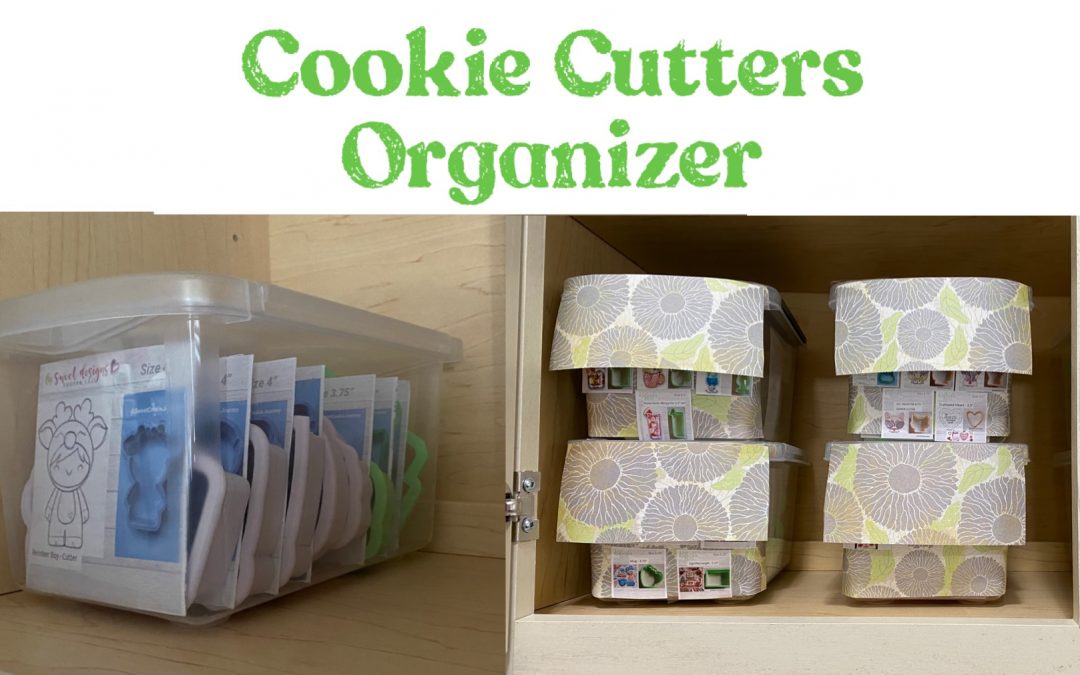
I can’t believe I found the right containers, they are a nice size, fit perfectly on my cabinet, holds about 7 – 9 cookie cutters at a time, is see-through, and are super affordable.
I found them at the Dollar Tree, sadly they only had a few with the white top but I was ok with the gray top too. If you can find them I think you will like how great they are.

Once I had each sheet made I added them on a program like Microsoft word or excel, (i prefer excel). I was able to include 4 on each sheet (and I also copied 4 of the same sheet but a lot smaller) these I will use for the sides.
To be honest I wasn’t sure what the right size might be so I printed one sheet just to check if the size in my Excel program was right and it was.
I continued to add 4 pictures at a time for each excel tab (page), I also double-check that each picture fit well on one page that the picture is not overlapping with the next page.

At first,
-
I printed the first set on the regular paper but I notice it wasn’t stable enough to hold each cutter, so the next best thing was printing on cardstock paper or a much denser paper.
-
Once you are happy with the paper type and size you can start cutting each. Cut regular size first and keep the smaller ones for later on.
Now you get to decide how you want to organize the cutters, do you want each bin to be classified as Seasonal, Alphabetical, or by Category.
You can start to place the cutter inside the bin and place the cookie cutter sheet right upfront of that cutter and continue until you are satisfied with the amount inside that bin.
For example, in my first bin, I started to include Christmas cutters. The first bin holds about 8 cutters.
One thing I notice is I can’t tell too much what each cutter is just by looking at it from the sides and that is when the small cookie cutter sheet comes in.
Those can now be taped on the side of the bin, this will make it a lot easier to find and know what’s inside that bin.
I am so happy with these bins, they fit perfectly inside my cabinet and they hold a nice amount of cutters. Yes, it took some time to organize but in the end, I believe it was worth it!!
I hope you enjoyed my cookie cutter organizing idea.