
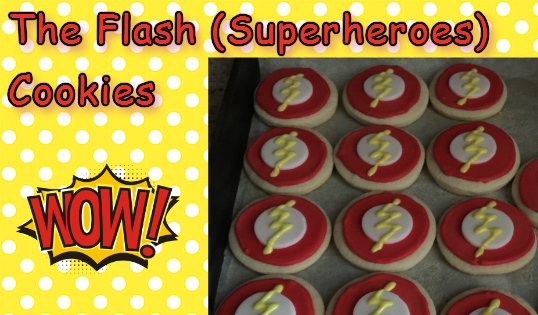
The Flash is a TV Show we enjoy watching as a family and since our sons birthday is this weekend we decided to celebrate his 18th birthday with The Flash as our theme. He doesn’t like to many birthday parties and we knew if we asked him he would say no, so since there is so much to celebrate this month we decided to make it a surprise.
My oldest son is turning 18 this year like I mentioned before( is still hard to believe he’s 18) is sad to see how quickly the years has passed by not only he turns 18, he graduates from high school and he also is schedule to go to the army so is a lot to take in.
We only have a few months to enjoy as much as we can with him and this is another moment we want to treasure before he enlist. I did mentioned is sad to see how quickly the years has passed by simply because before you know it the kids you still see are now grown young man ready to be on there own. Time has passed by so quickly that many times I wish I could go back in time and enjoy every moment with them again..
Well, now lets continue with the Flash theme Cookies
I created a Part 1, that shows you how to make the Almond Sugar Cookies – you can start here
Now that the cookies are baked, cooled and store in an air tight container, we are ready to begin the fun part (decorating the cookies)…
Once your Royal Icing is made, take about 1/4 of your icing and place in an air tight container, add your Red Food Coloring (the only one I use is the AmeriColor brand) you can order online or you should be able to find it at your local baking supplies store. Now I add a little bit of water (meaning a few drops at a time) and mix, add more drops of water and continue mixing until I find my desire consistency for piping (outlining the border of the cookie).
About 8 years ago when I took some cookie classes the Royal Icing recipe they gave us was very stiff making it hard for piping and outlining borders, my hand would hurt after a few cookies. But searching for newer recipes I found that the consistency could be softer but not so watery when piping, making it a very enjoyable process.
Place part of the Royal Icing in a bag using #2 or #3 tip. Outline outside or border of the cookie, you can trace a small circle using an edible marker and then Pipe the border with the Royal Icing.
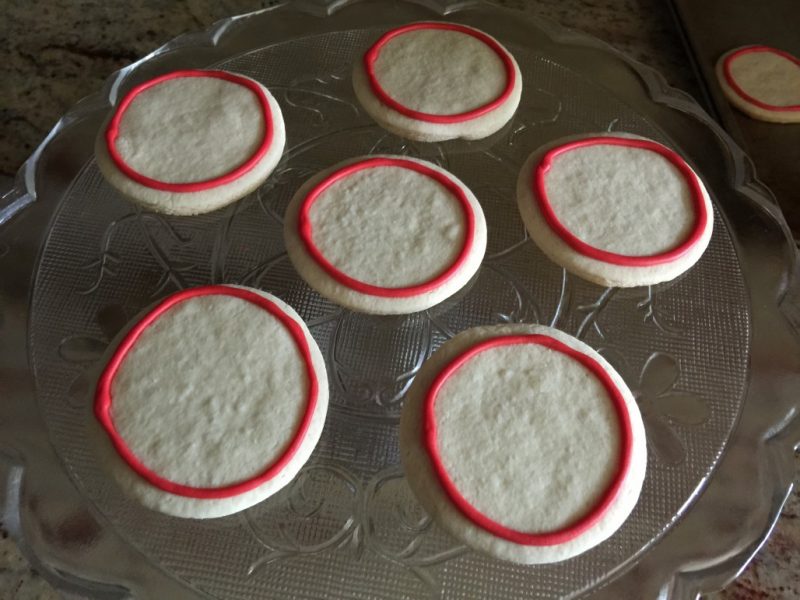
- Once you pipe all of your cookies, let them cool.
- With the remaining Royal Icing in container, add drops of water and mix until the consistency is softer ( I like to place my spatula in the middle of the icing as deep as 1 inch and count how many seconds it takes for the line to disappear, should take about 10 seconds) .
- Once royal icing is set, test one cookie by placing a few dabs of the Royal Icing in the middle of the cookie using your spatula (if the surface sets and looks even then your icing is ready, if it doesn’t set or it looks a little lumpy add a few drops to the icing in container and repeat the test)
- once your middle icing is ready, place in a zip lock bag or in a bottle so it can be easier to place on top of the cookie.
- add your icing on the middle and spread with spatula, butter knife or toothpick
- let cool.
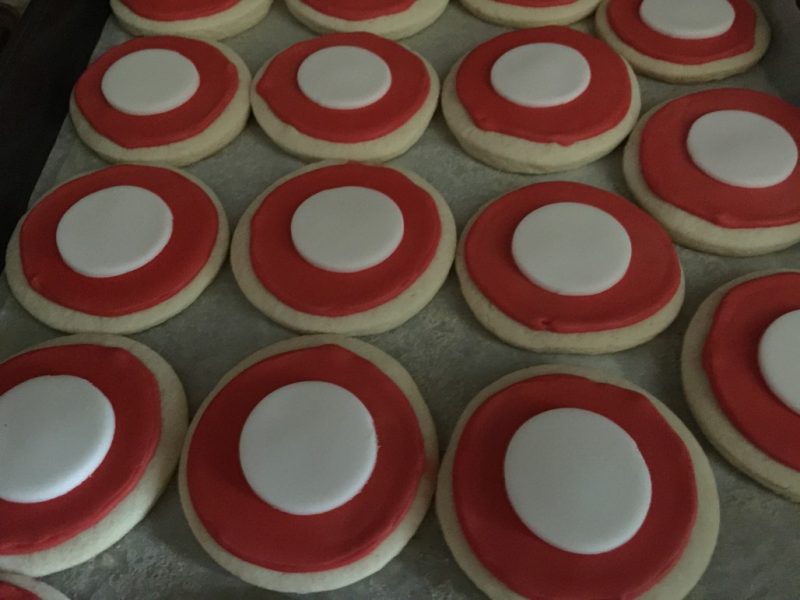
- take some fondant knead it first, with a rolling pin flatten fondant until is very thin
- with a smaller cookie cutter place on top of the fondant to get as many small circles as you can (enough for each cookie)
- add a few drops in the middle of the cookie and place fondant on top
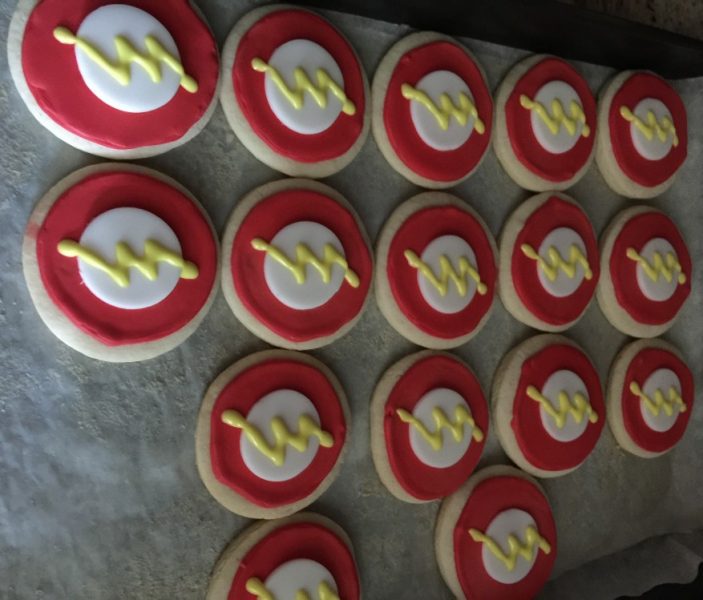
- Take about 1/4 of your icing and place in an air tight container, add your Yellow Food Coloring. Now I add a little bit of water (meaning a few drops at a time) and mix, add more drops of water and continue mixing until I find my desire consistency for piping (outlining the lightning bolt in the middle of the cookie).
- once consistency is ready place icing in piping bag or in a bottle
- make your lightning shape on each cookie
- let them dry

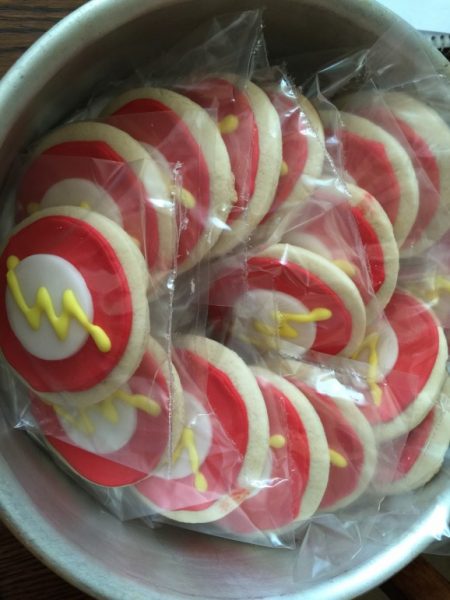
- Once cookies are cool, place them in a small cellophane bag and decorate with a cute ribbon or like I did to keep them fresh longer ( we used a heat sealer) Since the birthday is a pool party and all the cookies were going to be outside we chose to keep them in a bag.
enjoy… hope these cookies can inspire you to make them for your special event or just to make something fun…
thank you for stopping by… your comments will be appreciated…


